
|
|
| Using Finder Scopes |
If you have ever tried to point a telescope without a finder of some type, you have missed one of the most frustrating experiences in amateur astronomy. I have spent a long time trying to aim my telescope rifle style at the moon by looking along the tube. If it weren't for a few other techniques I used, I never would have found the moon. How can you not find an object as large as the moon you might ask? The moon covers 1/2 degree of sky and looks large when looking at it, but a 1/2-degree spot in the sky is very small. Look at a protractor or compass and see how small a degree is when it is compressed to that size. Using binoculars you can cover 4 to 7 degrees of sky and with them it is fairly easy to just point them and find the moon. Using a telescope at low power usually covers a little less than a degree. This is where a finder scope comes in. Finder Scopes are low powered and usually have cross hairs. The cross hairs in the finder scope should be aligned with the telescope so that when you have an object centered in the cross hairs, then look in the telescope, you should see the object with a low to medium power eyepiece. It is very important to take time to align the finder with the telescope.
Follow these steps to align a finder scope: During the day find and point your telescope at a very small object that is about a block away from you, such the insulator on a telephone pole (make sure it is as centered in the telescopes view as possible). Set your telescope so that it won't move. Now using the screws holding the finder scope to its mount, loosen them a little. Then adjust the screws until the cross hairs are centered on the object your telescope is centered on and the screws are tight. Recheck your telescope to be sure it is still centered at the same place and readjust both if necessary. The closer you set the finder scope the easier it will be to find what you are aiming at.
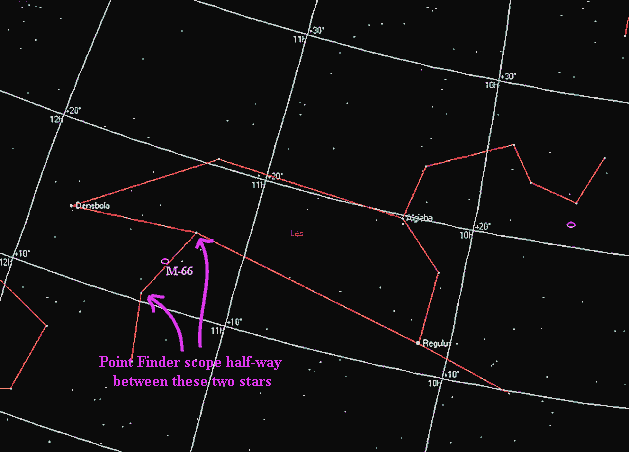
Finder scopes generally have small apertures (around 24mm). Those that are smaller will not bring in enough light to see anything but the brighter stars. While those that are larger, around 50mm, will be able to find fainter landmark stars (but look silly on a 60mm telescope). A lot of what you are going to be trying to find will be too faint to see through the finder scope. So what you will be doing is, looking at what you want to find on the star charts, noticing groupings of brighter stars that are close, and then finding those groupings of brighter stars in your finder scope to direct you to the faint object.
Here is an example of how to find M66 a galaxy:
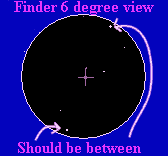
View through finder scope and locate your finder stars and estimate where M66 is.
Center finder scope on you estimate.
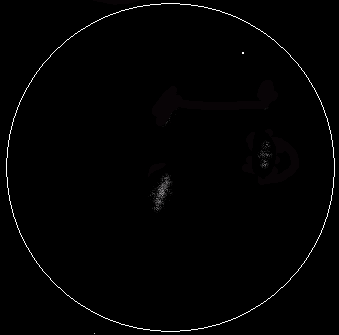
You found it! (M66 probably does not look like this).
In addition to finder scopes there are reflex finders such as the Telerad. This uses the same technology as is used in fighter jets, HUDs (heads up display). Here you have the advantage of seeing the whole sky with what appears as a bulls-eye projected on the sky. The Bulls-eye gives the advantage of having known degrees projected on the sky. There is no magnification or additional light gathering power advantage with Reflex Finders. There are also pointers that appear to project a red dot on the sky. All of these devices can be adjusted to align with your telescope and are used basically the same way as the finder scope to find stuff. Their main advantage with reflex finders is you see the sky as it is, not upside down or backwards.